
 |
| Amy Butler Weekender Bag Completed! |
 |
| I tied some checkered ribbon at the zipper handle to make it easier to find. |
 |
| Inside lining that was attached by hand. |
 |
| View from the top |
If you've been wondering what happened to my sew-my-stash-away challenge...it's alive and well. I have been quietly working on the mother of all handbags: the Amy Butler Weekender. Other than simple totes, this was my first bag that required some real professional handling.
I bought enough material to make TWO bags. All the fabric and supplies were taking up a lot of space under my cutting table, and making my room look like I hoard fabric or something. This is only the first version of the Weekender Bag. I don't know when I'm going to get around to the second bag. I feel like I just ran a marathon after finishing this one. Whew!
Stitching the bag almost broke my machine. Why? After you account for the many layers of Peltex, interfacing, and pleather, my poor little Juki's heart almost gave out. After four broken needles, chafed finger tips, and much perspiration, it's finally done. But the first thing I'm going to tell you is that I didn't follow the instructions exactly because it's pleather, and I needed to reduce some of the layers just to get it under my machine. I don't think anyone who posts on the internet has made one in pleather. I might have been the first (and last) foolish sewist to attempt such a daunting project. Which leads to my second realization...I am never going to sew this thing in pleather again. My second version is all fabric...and it should be a breeze compared to this one.
The whole project took me two weeks to finish, and it's best to break it up into increments. I needed a breather every so many hours. Kinda like babysitting an unruly child, we both needed some time outs. The first session should be reading the instructions in its entirety and doing another inventory of supplies before starting. I was still running around getting thread on day one of my cutting. I probably spent about 40 hours on this bag if you add up all the "thinking" time I took to do the pleather workarounds. If you have to ask...no, this is not really a bag for beginners, and yes, it's a very expensive bag to make. Supplies will run close to $100-plus after you're done, more if you make mistakes. Home decor fabric is more durable, but also more expensive.
 |
| Look at all the pieces you have to cut out, and this doesn't count the amount of time it takes you to make the contrasting piping. |


 |
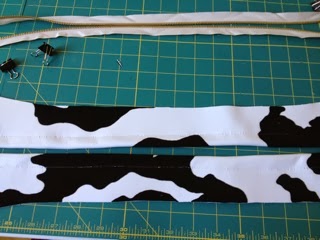
| I couldn't pin or use any basting stitch that would create holes in the pleather. I whipped out my trusty painters tape, which is indispensable for taping down zippers, to taping it to the presser foot so pleather can move smoother. A Teflon foot might have made things easier. But the black patches on the pleather is actually a synthetic velour which helped move the presser foot along. |
 |
| This is the zipper pieces. It's not clear, but I actually sewed the seamed closed first, and then attached the zipper. This is not the right way to do it normally, but had I basted a stitch and then ripped it out, it would have left holes in the pleather. |
 |
| I love the purse feet. I realized after buying the Clover purse feet that it would look too small compared to the weight of this bag. Be sure to get the larger feet. I found these great domed feet that came in black, and matched the bag perfectly...don't you think? See supplier below. |
Here are a list of things I did differently, mainly to eliminate bulk:
- I attached the main bag Peltex to the lining.
- I hand-stitched the lining to the bag
- I didn't follow the zipper instructions because one cannot press "open" pleather, nor can one baste any stitches that needs to be removed later without leaving gaping holes. Sewing with pleather is just like sewing with leather...but worse. It's not as pliable, and I actually think it's thicker.
- I extended the straps three inches, which makes it easier to carry on the shoulder
- I added large purse feet (I love them)
Here are a list of things I plan on adding to the next bag (whenever I get to it):
- Add a semi-padded interior pocket to house a small laptop, iPad, or reader
- Add more small pockets and may be a zipper pocket for my wallet
- Add magnetic snaps to the outside pockets
- Add side jump rings
- Use a "D" ring for the strap handles (I just feel like aesthetically, this might look better, but not sure if it might make the bag weaker by breaking up the handles.
Cautionary notes for my next bag:
- Don't sew with pleather unless you have an industrial leather sewing machine (I seriously thought about picking up a secondhand one to complete the bag)
- Have plenty of heavy duty Jeans needles ready, and switch them out a few times during the sewing process. I broke four needles, and used six in total, which means I switched out an unbroken one...or BETTER use leather needles (which I didn't have on hand).
- When ironing the fusible Shapeflex, be careful. Press from the center out, and then trim the edges that get stretched out. Don't put too much weight on the iron. It's very easy to wrinkle, and then distort your fabric on the other side, which doesn't look good. I've seen a few bags on the internet that have wrinkled bodies.
- Oil your machine before you start, and oil it again after you're done. My Juki sounded like it was hacking and coughing after I was done with the bag, and better again after lubricating.
- Don't use thin or loosely woven fabric for this bag, not even the lining. My red lining was a loose weave, and I found I had to add Shapeflex to it in order for it to keep its shape. You don't want anything to stretch when sewing this bag. I bought thick canvas for the lining and piping for my second version.
- Don't be cheap with your thread. Thread is rather a critical component to sewing the bag. I used polyester upholstery thread that looked thin, but it was strong. Let me repeat: don't be cheap about the thread. You want it to hold all those layers together!
Here are a list of my suppliers:
- Pleather from Discount Fabrics in Berkeley.
- The remainder of the supplies from Joann's Fabrics (including the lining, and interfacings)
- Pattern from The Granary in Sunnyvale, CA (but you can order it anywhere)
- Purse Feet from Pacific Trimming, NY (which is a great place to get all kinds of stuff for bag supplies). I bought the 24mm domed bag feet in black. Anything smaller, will look weird.
No comments:
Post a Comment