Showing posts with label Projects. Show all posts

Tuesday, October 8, 2013

A Bolt of Gray Fleece, Granny Pants, & Underwear

Vogue V8778 Pattern - Took me about two hours to sew.
I think I might add some kangaroo pockets next time. It looks a little plain.
One would think that after completing the Weekender Bag, I'd be pretty tired of sewing this week. It's been the exact opposite! My fingertips are still a bit chafed, but I'm persevering. Hot off my Bernina today is the Katherine Tilton fleece top. A couple of things I did differently, I sewed the collar to the opposite side so it opens up on my right instead of left.  It doesn't really matter if you're not adding the zipper opening. I didn't add the sleeve inserts either. I couldn't find anything to match the fleece, and I prefer vest-like tops where I can layer a long sleeve shirt underneath.
Easy pattern for beginners. I only used three pattern pieces.
I could have gone down a size. I made it in large.
I bought this 10-yard bolt of fleece from Joann's Fabrics last February during a 50 percent sale. The whole thing was about $26 dollars. This averages out to $2.60 a yard. I thought I was getting a ridiculous steel when I got it, and from the outside, the fleece was really soft and cuddly. The fabric is cheap in price, and cheap in quality. What did I expect for $2.60 a yard huh?
I will probably be sick of this fabric by the end of Winter.
After sewing with it, I quickly learned how it can fall apart if there's any seam ripping involved (which I had because I sewed the edges to the collar neckline too long.) I couldn't really fix my collar error without damaging the fabric, so I did a work-around on the stitching, and it's not the "best" but it's not noticeable either. This fleece also deteriorates with any kind of strong heat, and I accidentally melted part of the collar trying to steam down the edges before topstitching. Of course I had to use the slightly melted side as the under collar.

A couple of weeks ago, I posted on the G+ Community group about making some granny pants out of vintage polyester. What I really wanted was something super tapered like pencil pants. I remember wearing pants like this as a kid.  It's cute on kids, and then they turn into granny pants when you get older.

My challenge this week was remembering how to sew in a front fly pant zipper. I don't think I've done one in almost 20 years. I have been mostly sewing side zippers on pants, because I like the clean, flat pant fronts. But I'm looking to make some jeans and cargo pants soon, so I might as well start practicing. As usual, I couldn't figure out the instructions on the pattern.  But who should save the day? Sandra Betzina of course. Here is the tutorial I used online, and it's the BEST out there as far as explaining the process without stressssssssing me out. See her in action HERE.
I used a McCall's pattern for what looks like leggings, but view A, which is the bottom right in the picture below is actually PANTS!!! There are darts and a fly-front zipper. Who would have thought after just looking at these photos.
I think the next time I make these, I will use the legging pattern, which does not have side seams. But I did get the retro look, even though they don't look that great on. So I found someone who looked just like me but wearing a shorter version at the drug store. Hers had pockets, and I thought they were cute. And then I felt better about my granny pants.  :-)
Between the granny pants and fleece top, I decided to try my hand at copying RTW. I chose a pair of underwear that I've been wanting to copy since I saw the Hart's Fabric tutorial HERE.  These were hipsters, which I later adjusted the pattern to some basic briefs, AKA granny panties. Notice a running theme today? I had a t-shirt that was too small for everyone in the household to wear so I decided to use it as my muslin. No good...not enough stretch in the fabric. Wasting a perfectly good t-shirt made me sad.
The front is on the left. See where I taped a belly panel to turn it from a hip style to a brief?
I really liked this t-shirt, but it's child sized.

While I was about to make a t-shirt out of this super cute Paul Frank material, I decided to use a bit of it for my underwear pattern. There was definitely more stretch, but I have to see how it feels after I put in the elastic. It's now sitting in my "Waiting Pile" along with my corset pieces because I don't have the right elastic in my notion's stash. The giant roll of 3/8" elastic I bought off Amazon is actually rubber for bathing suits and too thick. Darn it! (I can't stand having uncompleted projects lying around.)
Yup...I copied and drafted this all by my lonesome.
One of the ladies from my sewing group will be around this weekend to help me with my corset. She's going to show me how to stitch a casing for the boning, and help me with cleaning up the fitting. I decided to do a pre-final version out of thin denim before cutting into my coutil. I still have to order grommet strips, lacing, and the busk. (Argh!) I'll be heading down to Lacis for the corset's steel boning after everything else is assembled and stitched. There's just so many components to organize.  I hope I don't get tired of making corsets after I'm done with this first one. 

I am using the Truly Victorian pattern for my corset.
I also re-shaped my dress form this week to see if I could get it more true to my body. It's okay, but I can't seem to get a true side seam. Making the taped dress form next year will probably really help. I'm trying to organize a class for that in late Winter. For now, I'm hoping the bodice muslin will help. Incidentally, while refitting the bodice, I noticed how my shoulders slope forward. I changed the shoulder line, and added the volume to the back bodice, and it looks pretty good. My body is probably morphing with age. 


I went through my stash again looking for fabric that I have not pre-washed. I found all my Shibori printed pieces I picked up this Summer on EBay, and two huge pieces of cool looking flannel that I've had for about ten years.  Just in time for pajama pants for the family!

After I was done with my projects, I noticed how full my scrap box was getting. There are pieces of material from every project I've made so far in this box. It's almost like a little fabric journal. Happy sewing everyone!


Friday, October 4, 2013

Amy Butler Weekender Bag - Pleather Version - Sew-My-Stash-Away Accessories Challenge

Amy Butler Weekender Bag Completed!
I tied some checkered ribbon at the zipper
handle to make it easier to find.

Inside lining that was attached by hand.

View from the top

You can't see me, but I'm really doing the "Happy Dance" right now.  

If you've been wondering what happened to my sew-my-stash-away challenge...it's alive and well. I have been quietly working on the mother of all handbags: the Amy Butler Weekender. Other than simple totes, this was my first bag that required some real professional handling. 

I bought enough material to make TWO bags.  All the fabric and supplies were taking up a lot of space under my cutting table, and making my room look like I hoard fabric or something.  This is only the first version of the Weekender Bag.  I don't know when I'm going to get around to the second bag.  I feel like I just ran a marathon after finishing this one.  Whew!

Stitching the bag almost broke my machine.  Why? After you account for the many layers of Peltex, interfacing, and pleather, my poor little Juki's heart almost gave out.  After four broken needles, chafed finger tips, and much perspiration, it's finally done.  But the first thing I'm going to tell you is that I didn't follow the instructions exactly because it's pleather, and I needed to reduce some of the layers just to get it under my machine.  I don't think anyone who posts on the internet has made one in pleather. I might have been the first (and last) foolish sewist to attempt such a daunting project.  Which leads to my second realization...I am never going to sew this thing in pleather again. My second version is all fabric...and it should be a breeze compared to this one.

The whole project took me two weeks to finish, and it's best to break it up into increments. I needed a breather every so many hours. Kinda like babysitting an unruly child, we both needed some time outs. The first session should be reading the instructions in its entirety and doing another inventory of supplies before starting. I was still running around getting thread on day one of my cutting.  I probably spent about 40 hours on this bag if you add up all the "thinking" time I took to do the pleather workarounds. If you have to ask...no, this is not really a bag for beginners, and yes, it's a very expensive bag to make. Supplies will run close to $100-plus after you're done, more if you make mistakes. Home decor fabric is more durable, but also more expensive.

Look at all the pieces you have to cut out, and this doesn't count the amount of time
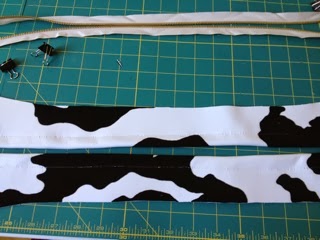
it takes you to make the contrasting piping. 

When I made the piping, I thought I would be "smart" and use some Stitch Witchery on the inside to hold the cording in place without having to stitch it down by machine. Ironing it on still takes a lot of time though.  In the end, the fabric I used didn't adhere to the Stitch Witchery evenly so I ended up sewing it anyway.  This wasted some more time.

I couldn't pin or use any basting stitch that would create holes in the pleather.
I whipped out my trusty painters tape, which is indispensable for taping down
zippers, to taping it to the presser foot so pleather can move smoother.  A Teflon foot
might have made things easier. But the black patches on the pleather is actually
a synthetic velour which helped move the presser foot along.
This is the zipper pieces. It's not clear, but I actually sewed the seamed closed first,
and then attached the zipper.  This is not the right way to do it normally, but had
I basted a stitch and then ripped it out, it would have left holes in the pleather.
I love the purse feet. I realized after buying the Clover purse feet that it
would look too small compared to the weight of this bag. Be sure to get the
larger feet. I found these great domed feet that came in black, and matched
the bag perfectly...don't you think?  See supplier below.

Here are a list of things I did differently, mainly to eliminate bulk:
- I attached the main bag Peltex to the lining.
- I hand-stitched the lining to the bag
- I didn't follow the zipper instructions because one cannot press "open" pleather, nor can one baste any stitches that needs to be removed later without leaving gaping holes. Sewing with pleather is just like sewing with leather...but worse. It's not as pliable, and I actually think it's thicker.
- I extended the straps three inches, which makes it easier to carry on the shoulder
- I added large purse feet (I love them)

Here are a list of things I plan on adding to the next bag (whenever I get to it):
- Add a semi-padded interior pocket to house a small laptop, iPad, or reader
- Add more small pockets and may be a zipper pocket for my wallet
- Add magnetic snaps to the outside pockets
- Add side jump rings
- Use a "D" ring for the strap handles (I just feel like aesthetically, this might look better, but not sure if it might make the bag weaker by breaking up the handles.

Cautionary notes for my next bag:
- Don't sew with pleather unless you have an industrial leather sewing machine (I seriously thought about picking up a secondhand one to complete the bag)
- Have plenty of heavy duty Jeans needles ready, and switch them out a few times during the sewing process. I broke four needles, and used six in total, which means I switched out an unbroken one...or BETTER use leather needles (which I didn't have on hand).
- When ironing the fusible Shapeflex, be careful. Press from the center out, and then trim the edges that get stretched out. Don't put too much weight on the iron. It's very easy to wrinkle, and then distort your fabric on the other side, which doesn't look good. I've seen a few bags on the internet that have wrinkled bodies.
- Oil your machine before you start, and oil it again after you're done.  My Juki sounded like it was hacking and coughing after I was done with the bag, and better again after lubricating.
- Don't use thin or loosely woven fabric for this bag, not even the lining. My red lining was a loose weave, and I found I had to add Shapeflex to it in order for it to keep its shape.  You don't want anything to stretch when sewing this bag.  I bought thick canvas for the lining and piping for my second version.
- Don't be cheap with your thread.  Thread is rather a critical component to sewing the bag.  I used polyester upholstery thread that looked thin, but it was strong.  Let me repeat: don't be cheap about the thread.  You want it to hold all those layers together!

I might consider doing this bag again using real pig skin leather.  Wouldn't that be lovely? I feel like since I can tackle pleather, leather should be easier. In my dreams.

Here are a list of my suppliers:

- Pleather from Discount Fabrics in Berkeley.
- The remainder of the supplies from Joann's Fabrics (including the lining, and interfacings)
- Pattern from The Granary in Sunnyvale, CA (but you can order it anywhere)
- Purse Feet from Pacific Trimming, NY (which is a great place to get all kinds of stuff for bag supplies). I bought the 24mm domed bag feet in black.  Anything smaller, will look weird.


Sunday, September 22, 2013

Sew-My-Stash-Away Weekend with Hart's Fabrics

More Victory Patterns can be seen HERE


A few of the ladies in my local sewing group went to Hart's Fabrics in Santa Cruz for a shopping field trip. They had a one-day 20% store-wide sale to kick off their September sewing event. I thought for sure I'd have enough time to get to my Hart's stash...and then September 21st rolled around and I realized I had done nothing all month.  So for the last 24 hours, I've been sewing like mad.

I decided to tackle the Lola dress from Victory Patterns. It took me a total of seven hours to complete from the time I opened the pattern to the photo. I messed around with the pattern for about an hour, and decided to test out my new roll of butcher paper. I think this is going to be one of those patterns that I want to keep and make over and over again. After I shortened the bodice by half an inch and the bottom half of the dress by one inch, I ironed it onto butcher paper. 

This is the first time I sewed something that ended up being nearly two sizes too big. Even though this is my very first Victory pattern, I decided that I am in love with them.  They have real people sizes, and they do give you a generous ease. I'm so used to sewing "big" when it really means "small" from the US pattern companies. They have so many cute designs too...if they weren't $20 each, I would have bought them all.  

I used a thin sweatshirt fabric, that I thought was too thin for this pattern, and had a tendency to sag and pull. I know it's a stretch fabric, but the weave was especially loose. If you decide on making this dress, find something that doesn't stretch as much. I decided to forgo top stitching because I knew it would stretch out the fabric more. Also the large pockets...well, are LARGE. The pattern wants you to make them a little droopy. It's cut wider than the skirt, and you match up the side seams to create a droop. I anticipated that this fabric would not hang well with such droopy pockets so I created flatter pockets. I wished that I had flatten the pockets completely.  Don't blame the pattern. It's just not the best fabric for this dress.  It also shed like a rabbit.

Notice the little decorative black point at the neckline? I originally used a piece of the black ribbing for this, but it got stretched out of shape. I used some leftover pre-washed wool jersey instead. I overlocked the edges, and then attached it using stitch witchery before sewing it onto the bodice neckline.  I wish the whole dress was glued to Stitch Witchery. If I wasn't so lazy, I would have used it on all the edges of the dress before sewing to keep the seams from stretching. (This is a "sewing-with-knits" technique that I did not use.) BTW, Stitch Witchery is my favorite iron-on magic tape. I used the thin rolls cut for hems. I might add it on the seams for my second attempt at this dress.


It really looks better on me than on the dress form. Here is a not-so-great picture of me wearing the dress.  I plan on making it again with some velour fabric, and adjusting the pattern down at least one size first.


Here's the dress turned inside out. It has terry cloth loops on the back side. So it could be a nice reversible piece, but due to its stretch issues, I couldn't do it this time. This dress is meant serger sewing, and there's 1.5 cm seam allowance. I haven't used my serger in a while, so I was a bit rusty. The differential foot probably saved my dress from being completely pulled out of whack.

This is an "intermediate" level pattern. It's really not that difficult to sew.  There are a ton of pieces, and it's always tricky using stretch knits in general. It is not a pattern for the faint of heart, and it will take you more than four hours to complete from start to finish.  Faster of course, if it's not your first time.  I'll update this post with my second version once completed. I'm really excited about making more Fall/Winter/Holiday wear.

I also used another piece of fabric from Hart's to make the KWIK SEW bow-tie blouse I made last week.  I just updated my earlier post. See my final version of the blouse HERE.  Making something twice in the same week can really speed up the repeat version. 

Happy sewing!

UPDATE: I did not pre wash the sweatshirt fabric before cutting and sewing the Lola dress. I took some big chances I know. But the dress turned out almost two sizes too big for me, so I decided I didn't have much to lose by throwing it into the washing machine and then the dryer. It shrunk...luckily down to the perfect size! The dress shrunk in all the right places without any distortion. This was pure dumb luck...and I'm not sure if I would be this lucky next time I decide omit pre washing cotton. 

Friday, September 20, 2013

Sew-Away-My-Stash: Burda "Sarah" Shrug with Tutorial

Burda "Sarah" shrug #8173. $2.00 download.
100% stretch (boiled) wool in eggplant from
Stone Mountain & Daughter
Lining from Gorgeous Fabrics.
This was my second Burda pattern. I thought it was a fluke that I couldn't understand the instructions on the first Burda pattern. Go back and see my Spring Lace Dress HERE. I officially think their instructions suck. The "Sarah" shrug had instruction examples for another pattern, and then about a paragraph that was related to the actual piece. The only comprehensible thing was: match the shoulders at the dot.

Thank God it's only two pieces. But it wasn't really cut in a way I could understand it. Maybe I'm just geometrically challenged.  After transferring the pattern onto paper, I took one look at the shape, and scratched my head.  Where is the front? Where is the back?  There are no markings on the pattern except the grain line, two dots, and a pleat.

Since the wool was a little itchy, I used a crazy thin polyester print I picked up at Gorgeous Fabrics for a lining. I realized after stitching it together, I could probably wear it either way, and play with the opening a bit.


In case you decide to make this too, here are some quick instructions on how I figured out how to piece it together and get the right length for the sleeve.

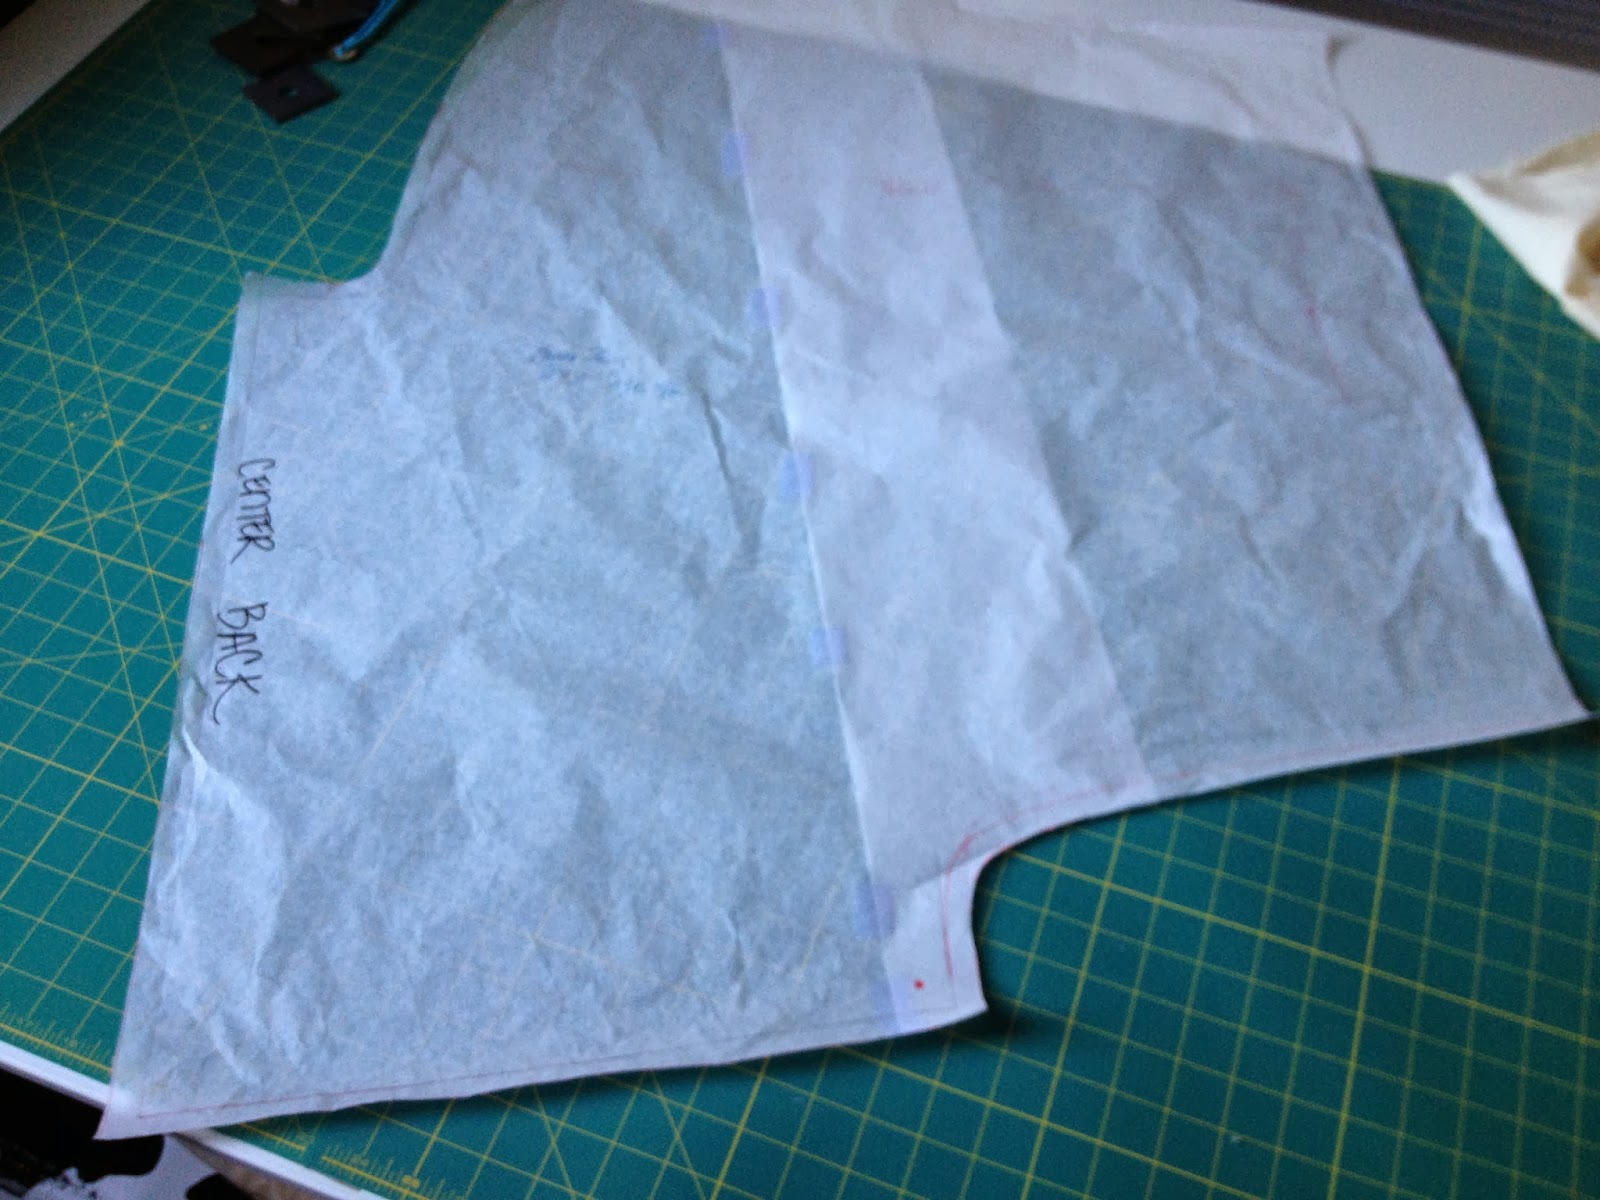
The paper was too awkward to maneuver on my dressform.  So I cut the pattern out into muslin so I could work with the shape. After I found where the center back was, I marked it on my pattern.  Here's the picture of the pattern.  The center front line is the straight edge on the left.

 The pleat marking is on the right, shorter straight edge.  You see it here. This is actually the end of the sleeve. Not really a cuff, but an actual style line for the sleeve.
Once I cut the muslin out, I pinned it together to see how it draped on the dressform.  The first thing to do is pin together the pleat at the wrist opening. It is an inverted pleat. so it looks like this on the right side.
Then match up the dots together on the shoulder area. These are the marks you transferred over from the original pattern along with the pleat and grain line. Then pin the underarm seam.

 This is what half of your shrug will look like after it's pinned.
Now drape it on the dressform or put it on to check the length, especially the sleeve length. I found the sleeve a couple inches too long. So I cut off an inch before cutting the real fabric. Here are the front and back of the half muslin.

I used a stretch wool fabric with a simple checkered pattern. It's difficult to see the print, because the pattern lines are very thin and almost blends into the main fabric color.  In hindsight, I would not have used a printed fabric.  The only place I was able to match the print was at the center back, and pray it all worked out in the front too. The front was actually more symmetrical than the back on the completed shrug.

I had to use a walking foot to stitch the lining to the wool.  The wool was stretch and the lining was slippery. I found after an inch or two of sewing that I couldn't keep the fabric straight. The walking foot did the trick. I hand-stitched the lining to the sleeve opening. The rest I did by machine with right sides together, left a hole in the back collar (should have been at the bottom, but I forgot to stop there). Then I hand-stitched the open neck lining to the wool.  I should have really hand-stitched the whole lining together like I was taught to do. But I was feeling lazy. I might rip it out and restitch it by hand if I feel like it's not hanging right. But it seems okay for now.

Because of the poor instructions, the slippery lining fabric, and matching up the checked print, it slowed me down a good 90 minutes. The actual sewing was super easy. If I had omitted the lining and used a plain fabric, this project would have taken less than three hours to complete. I ended up taking about 4.5 hours to finish everything.  It is ideal for a beginner...but sadly, not the instructions.

The original sample from Burda looks like a "granny" shrug, especially if you add the trim to the edges. I really wanted to give it a modern look. Keeping the sleeve shorter helped, and the lining added more color to what I thought was rather drab.  See it HERE.

Happy sewing!

Tuesday, September 17, 2013

Sew-Away-My-Stash Tuesday - Updated!!!


KWIK SEW K3782
See the pattern HERE
UPDATED:

I just made this pattern again (for real this time), using fabric I purchased at Hart's Fabric earlier this year. It is bright (has yellow in it), and drapes beautifully. Even my daughter liked it, and wants to borrow it sometime.  What do you think? What a difference from my muslin which was a beast to sew with. I think the muslin can still be my beach cover-up. Which was what I intended for the fabric when I first bought it.

For this version, I added thin knit woven interfacing that I purchased from Fashion Sewing Supplies for the armhole facing. I don't think it's really necessary, but it does help keep its shape.  I made sure to measure the tie collar before sewing it in this time. I also shortened the blouse an inch so it could sit nicer on my hips without tucking it in. For the hem, I folded up one layer and straight stitched it, and then hemmed it another inch by hand. I think lighter fabrics drape better this way.

The second version took me about two hours to complete. It's nice to know that I can whip up one of these in an afternoon for every season.  Happy sewing!

ORIGINAL POST STARTS HERE:

I was really attracted to the color yellow this past Spring. Almost every piece of Spring/Summer fabric had some shade of it in there.  It was a part of my color palette and I had high hopes to get everything done before Fall. So I thought. Here I am in September still chipping away at my stash.

It's Wednesday in California, and it took me about four hours to complete this top from start to finish. I had to copy the pattern because the other view had sleeves, and I wanted the option of making it with sleeves later. The arm hole was different for this View B of the KWIK SEW pattern.

Here is is tied into a bow. I like the bow better.
This fabric is horrible to work with, and I almost threw the whole piece away when I got to the arm hole.  I knew it wouldn't be easy but I had hope that it would be one of those days that everything would just go perfectly smooth. But it didn't. Had I used a different fabric, I would have been finished in less than three hours.

Not only is it chiffon, there are tiny round plastic sequin glued onto the print. I don't know if you can see it in the photos.  I couldn't iron it without using a press cloth, and being polyester, the seams just never laid flat.  Pressing was painful and dangerous since I feared those plastic buggers might melt onto my iron.

I was going to make a swimsuit coverup with this fabric, but decided to test out this pattern before I use a nicer slippery fabric. I also played around with my rolled hem foot, which was shockingly easy to do with this ridiculous chiffon. I made a boo boo with cutting the front tie. I transferred the marking wrong, or the pattern is off. (I don't know because I haven't gone back to check the pattern yet.)  I recommend matching up the tie to the neckline before sewing the edges of the tie. I had to go back and unstitch some of the tie and repin it to match the notches on the corner. Unmatched seams in the front would be exposed and the casing in the front too short. I was going to make the casing wider, but the blouse is cut slightly at an angle at the front neckline, which would distort the shape where the tie inserts into the casing.

A quick note...this is my second KWIK Sew pattern, and I have to say that I really like the quality pattern paper, and generally easy and simple instructions.  I could never understand why the patterns were so much more expensive, but now I do. I also found with both pieces that the measurements and sizes were very realistic and I didn't have to do any adjusting. I think I'm going to collect more KWIK Sew patterns in the future.  They really save me a lot of time, even though they are a few dollars more.

Happy sewing your stash away too!


Monday, September 16, 2013

Sew-Away-My-Stash Project - Two Hours

Kwik Sew 3801 Pattern, view from the right.
Get it HERE
After filling my stash cupboards to the brim with new fabric...I am officially on fabric-purchasing hiatus. I know, I keep saying that, and I can't seem to stop acquiring new stuff.  It's for real this time. The only thing I'm going to let myself have between now and the end of the year are notions I need to complete the project.

I don't know about other sewists, but some days I just don't have the time or patience to start a detailed project that I know will take me eight hours or more to complete. More often than not, I need instant gratification...particularly on days where I feel like I didn't get much work done.  Today was one of those days.

Enter: accessories. Sewing them are easy, useful, and make a great size-free gift. A couple of weeks ago it was my reversible linen tote bag, which I completed in one go from start to finish. Best gift I ever made in a couple of hours.  Today it was this shawl/cover-up/top piece.

I want to give Joann's Fabric a shout out, because I have found some pretty crazy prices at their discount table. Coupled with an additional 50% off coupon, I was able to get pieces for $4-6 dollars a yard. And if you buy the whole bolt end, you'll get a little more off the last quarter yard or so.  If you dig hard enough...you can find a gem. I consider this lemony knit one of those hidden gems.

View of the top from the left. This is really more 
a shawl than a top, and would look great worn over 
a pretty sleeveless dress. 
This little fancy knit number is a loose weave made to mimic a knitted lace, and it's decent quality considering the price I paid.  It came straight from the discount table this past summer, and being an end-bolt piece, I got a little more off the final price. I am certain this one and five-eighth-yard of fabric cost no more than six or seven dollars. The Kwik Sew pattern I used might have cost about the same price as the fabric.

I am not sure about the fabric content, but it is definitely a blend of some sort. It feels like a cotton, but it's not.  I know this because it pre-washed well in a lingerie bag in cold water, and survived the dryer on low with very little shrinkage.  Maybe some of you sewists out there have this knit in your stash and can let me know.

Sleeves work like a Kimono cut. They are almost
three-quarter length, and fit very snug in the forearm
area.  Make sure your fabric is stretchy. 
I have to admit that I was a little lazy with the seams. I also didn't have clear elastic for stabilizing the back neckline.  (I've got to add this to my stash...and you can get it HERE at Fashion Sewing Supply. It's great to use and nearly invisible.) I just used a remnant piece of white elastic for the back collar. I serged everything except the hem, which I used a long and wide zigzag stitch.  I didn't bother to hem the sleeve and just freehand zigzagged it on the machine.  It created a nice little ragged look that I wished I used for the hem.  If I wasn't so lazy about adjusting my serger to a rolled edge, I might have tried it on the seams, but I didn't feel like playing around with it and wasting time. The fabric was tricky to work with because the edges kept rolling up onto itself, making a clean seam challenging. If it wasn't for this, I might have been done a half-hour earlier.

Careful with the hemming! A rolled edge is best or you have to stitch the hem in different directions so it's less obvious. This is because of the way it wraps in the front. I had to drape it over my dressform to figure out which direction to hem it. But if you're doing a rolled hem...no worries.

It is long enough to cover my backside. I am 5'3" 
and it wasn't too long for me.
This was just a muslin, but it turned out so well that I can actually wear it. The pattern is almost fool-proof, and the fabric is forgiving for the most part.  I didn't even use matching thread, just off white, and you can hardly notice.  This pattern is almost a one-size-fits-all type of piece, even though there are four sizes available. I sewed it in medium which matched my bust size. I was going to shorten it, but I'm glad I didn't. The finished length was about 28 inches, and I like how it covered my backside. There's a huge amount of ease in this top too.

Happy sewing your away your stash too! (I know you got some.)